
From Sketch to Display: Making Professional Acrylic Standees
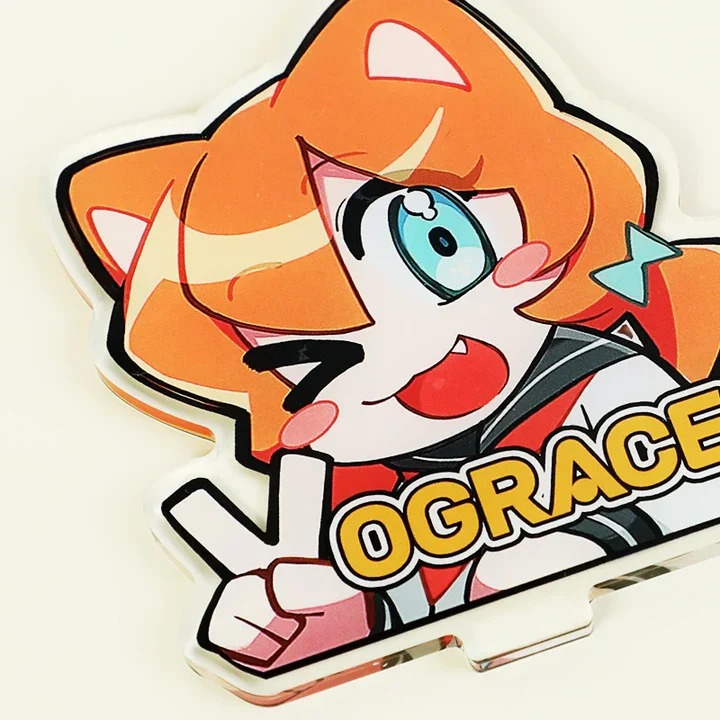
In today’s creative and merchandising world, acrylic standees have become one of the most popular ways to turn artwork into physical products. From anime characters and gaming heroes to brand mascots and original illustrations, these vibrant displays bring designs to life in a sleek, modern format. But behind every polished acrylic standee is a careful creative process that transforms a simple sketch into a professional finished product.
This guide walks you through the complete journey—from initial sketch to final display—so you can understand how professional acrylic standees are made and how artists, designers, and brands bring their ideas into reality.
Understanding Acrylic Standees
An acrylic stand is a printed display piece made from clear or colored acrylic material, cut into custom shapes and supported by a base. It is designed to stand upright on surfaces like desks, shelves, or retail counters.
These displays are widely used in:
- Anime merchandise
- Gaming collectibles
- Retail branding
- Promotional events
- Artist merchandise shops
Their popularity comes from their glossy finish, durability, and ability to showcase detailed artwork in a compact form. A well-made acrylic stand can transform a simple illustration into a collectible product that feels premium and professional.
Step 1: Creating the Initial Sketch
Every acrylic standee begins with an idea. This is usually expressed through a rough sketch or digital concept art. At this stage, the focus is on composition and creativity rather than final details.
Artists consider:
- Character pose and expression
- Overall theme or message
- Balance of visual elements
- Intended audience appeal
A strong sketch is essential because it sets the foundation for the entire design. Whether it’s a dynamic anime character or a minimalist brand logo, clarity at this stage ensures a smoother production process later.
Step 2: Refining the Line Art
Once the sketch is finalized, the next step is refining it into clean line art. This is a crucial stage because acrylic printing requires sharp, precise outlines.
During this process:
- Rough lines are cleaned and corrected
- Proportions are adjusted for balance
- Details like facial features and accessories are sharpened
- Final outlines are prepared for coloring
Clean line work ensures that the final acrylic standee looks professional and visually appealing when printed.
Step 3: Adding Colors and Visual Depth
After line art is completed, the design moves into the coloring stage. This is where the artwork truly comes to life.
Artists focus on:
- Choosing a consistent color palette
- Adding shading and highlights
- Enhancing lighting effects
- Creating contrast for better visibility
Since acrylic material enhances vibrancy, colors must be carefully selected to avoid oversaturation or dullness. High contrast designs tend to work best because they remain visible even from a distance.
Step 4: Preparing the Design for Acrylic Printing
Before production, the artwork must be optimized for printing. This step ensures that the final product maintains high quality and accuracy.
Key considerations include:
- High resolution (usually 300 DPI or higher)
- Transparent background for cut-out designs
- Safe margins to prevent cutting errors
- Layer separation for multi-piece standees
Designers also ensure that no important elements are too close to the edges, as acrylic cutting requires precision.
Step 5: Choosing the Right Acrylic Material
Not all acrylic is the same. The material used can affect clarity, durability, and overall appearance.
Common options include:
- Clear acrylic for standard designs
- Colored acrylic for themed branding
- Frosted acrylic for soft visual effects
- Layered acrylic for 3D depth
The choice depends on the style of the artwork and the intended use of the standee. For example, anime collectibles often use clear acrylic to highlight vibrant character art.
Step 6: Printing the Design
Once the artwork and material are ready, the design is printed onto the acrylic sheet using UV printing technology. This method ensures:
- High color accuracy
- Long-lasting print quality
- Resistance to fading
- Sharp detailing
UV printing allows the ink to bond directly with the acrylic surface, creating a durable and professional finish.
Step 7: Cutting the Acrylic Shape
After printing, the acrylic sheet is cut into the desired shape using laser cutting machines. This is where precision becomes extremely important.
Cutting methods include:
- Standard outline cutting
- Die-cut custom shapes
- Intricate detailed cutting for complex designs
The goal is to match the shape of the artwork exactly, whether it’s a character silhouette or a logo design.
Step 8: Assembling the Standee
Once the pieces are cut, the standee is assembled. Most acrylic standees consist of two or more parts:
- The main printed character or design
- A base that holds the structure upright
The base may also include branding, logos, or decorative elements. Assembly is typically simple, with slots or connectors designed for easy fitting.
Step 9: Quality Inspection
Before packaging, every acrylic standee goes through a quality check. This ensures that the final product meets professional standards.
Inspection includes:
- Checking print clarity and color accuracy
- Ensuring clean cut edges
- Verifying stability of the stand
- Confirming no scratches or defects
Only products that pass this stage are prepared for delivery.
Step 10: Packaging and Presentation
Packaging plays a major role in the customer experience. Acrylic standees are usually wrapped in protective film and placed in secure packaging to prevent damage during shipping.
Good packaging includes:
- Protective plastic wrapping
- Foam or cardboard inserts
- Branded boxes for premium appeal
- Instruction sheets for assembly (if needed)
Well-designed packaging enhances perceived value and makes the product feel more collectible.
Design Tips for Better Acrylic Standees
Creating a professional acrylic standee is not just about production—it also depends heavily on design quality. Here are some tips to improve results:
- Use bold, readable silhouettes
- Avoid overly complex backgrounds
- Focus on character expression
- Maintain strong color contrast
- Keep branding subtle but visible
These principles help ensure that the final product looks polished and market-ready.
Why Acrylic Standees Are So Popular
The growing popularity of acrylic standees comes from their versatility and visual appeal. They offer:
- Affordable collectible options
- High customization flexibility
- Strong visual impact
- Long-lasting durability
- Compact display convenience
From fans to brands, everyone benefits from their ability to turn simple artwork into physical collectibles.
Final Thoughts
The journey from sketch to display is a detailed process that combines creativity, technical skill, and precision manufacturing. Each stage—from initial concept to final packaging—plays a crucial role in producing high-quality acrylic standees that stand out in the market.
Whether used for personal artwork, merchandise, or branding, acrylic standees provide a powerful way to showcase creativity in a tangible form. With careful design and production planning, even a simple sketch can become a professional product that captures attention and adds value.
For artists and businesses looking to expand their product offerings, investing in well-designed acrylic standees is a smart step toward building a strong visual identity and connecting with audiences in a meaningful way.